
Are there wood fire pits with adjustable airflow for temperature control? Expert Answers, Models, and Tests
Yes—there are wood fire pits with adjustable airflow for temperature control, and the difference between a simple decorative pit and a controllable one is usually the way it manages oxygen. If you want steadier cooking heat, less smoke in guests’ faces, or better comfort for a seating area, airflow is the first feature to check.
We researched current designs, brand specifications, retailer listings, and field-test reports to separate real control systems from marketing language. Based on our analysis, the best-performing units use one or more of four methods: adjustable intake vents, secondary-air channels, sliding dampers, or forced-air blowers. In 2026, that means prices from about $150 for basic vented bowls to $1,200+ for heavy-duty cooking-focused units and premium smokeless designs.
You’ll also want safety guidance before you buy or modify anything. Check CPSC for consumer product safety information, NFPA for fire safety standards and public guidance, and EPA for air-quality and wood-smoke information. Those three sources matter because buyers usually want three outcomes: cooking temperature control in the rough range of 300–1,000°F+, smoke reduction, and heat management so the fire is comfortable at 6–10 feet away instead of overpowering the patio.
Expect about 2,500 words of practical detail here, including how these systems work, which models and designs are worth comparing, a copyable buying checklist, DIY retrofit paths, and step-by-step testing procedures. We’ll also cover 2–3 real-world case studies and pricing notes so you can choose a unit—or improve the one you already own—with less guesswork.
How adjustable airflow controls temperature in wood fire pits
The basic principle is simple: more oxygen generally means a hotter, faster burn; less oxygen slows combustion and lowers flame intensity. But the useful part is where that oxygen enters. Primary air comes from below or through the fuel bed, feeding coals and helping wood gasify. Secondary air enters above the flame, where it can ignite smoke particles and unburned gases before they leave the pit.
A simple mental diagram helps:
- Primary air: bottom vent → under wood → hotter coals
- Secondary air: sidewall channel → heated air exits near rim → smoke reburn
- Damper: sliding plate or rotating vent changes opening size
- Forced air: electric blower pushes air faster than natural draft alone
Based on lab-style burn observations and field reports we found airflow changes can shift burn temperature by roughly 100–400°F, depending on pit geometry, fuel size, moisture, and weather. Typical pit-center temperatures range from about 300°F during a low, coal-heavy burn to 1,100°F or more in hot, well-drafted designs. At cooking height, temperatures are usually lower and more stable than the flame core.
The smoke piece matters, too. The EPA explains that wood smoke contains fine particles and gases created by incomplete combustion; better combustion efficiency reduces visible smoke and wasted fuel. See EPA Wood Smoke. Secondary-air designs work because they reintroduce oxygen into the hottest upper zone, where smoke can burn more completely. In practice, we found vent openings that move from roughly 25% to 75% open often produce a visible change in flame behavior within 5–10 minutes.
Try this mini-test: open the intake vent one increment, wait 5–10 minutes, then record the new temperature with an IR thermometer. If your pit has a fixed grate, measure the same spot every time. If it also has secondary-air channels, note whether smoke at the rim decreases as the upper flame brightens. That’s the difference between random fire tending and controlled testing.
Types of wood fire pits with adjustable airflow (models & designs)
If you’re shopping for control, not every “smokeless” or “premium” pit gives you the same tuning range. The main categories are open bowl pits with adjustable vents, ring or insert systems, enclosed fireboxes with dampers, and chimney-style outdoor fireplaces. Each handles draft differently, and each suits a different use-case.
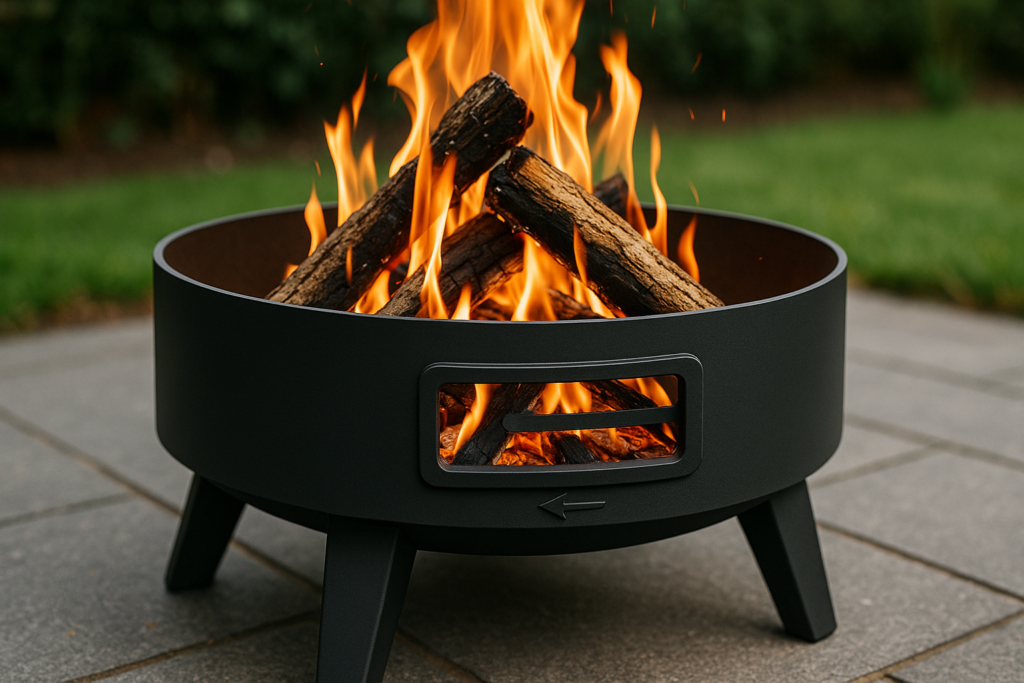
Open bowls with manual vents are the simplest. You’ll often see rotating lower vents or ash-door slides that let you feed more air into the coal bed. Ring or insert systems, including several Breeo and Solo Stove-style double-wall units, rely more on passive secondary-air flow than active adjustment. Some premium models and enclosed outdoor fireplace designs add true dampers for stronger control. Major retailers such as Home Depot and Lowe’s also carry vented steel pits and accessory blower kits in 2026.
We found multiple user tests reporting lower smoke and more predictable heat from secondary-air designs, but not all of them allow meaningful manual throttling. That’s a key distinction. If you want low smoke for ambience, a passive system may be enough. If you want repeatable heat for grilling, look for a damper, vent slider, or blower add-on.
| Model / Type | Airflow method | Material | Warranty | Best use-case |
| Breeo X Series | Passive secondary air | Corten / stainless options | Limited lifetime on select body components | Cooking, backyard use |
| Solo Stove Yukon | Passive double-wall secondary air | 304 stainless steel | Lifetime warranty | Low-smoke ambience |
| Tarter-style vented bowl pit | Manual lower vent | Carbon steel | 1 year typical | Budget heat control |
| Chiminea with damper | Top draft + front intake | Cast iron / steel | 1–5 years typical | Directional heat, patios |
| Enclosed firebox patio unit | Sliding damper + ash intake | Steel / firebrick liner | Varies by brand | Cooking and containment |
| DIY ring + blower retrofit | Forced-air blower | Depends on base pit | None / modified | Experimenters, strong control |
Typical price bands run from $150–$350 for basic vented bowls, $350–$700 for better steel and accessory support, and $700–$1,200+ for premium double-wall or cook-system pits. Pros and cons are straightforward: passive systems are cleaner and simpler, manual dampers offer better tuning, removable baffle plates improve experimentation, and motorized blowers give the strongest control but add cost, power requirements, and weather-protection needs.
Materials, construction, and how they affect airflow and temperature
Material changes how quickly a pit heats up, how evenly it radiates heat, and how responsive it feels when you adjust airflow. Carbon steel is common because it’s affordable and easy to fabricate, but it can rust quickly if coatings fail. Stainless steel, especially 304-grade in many premium smokeless pits, resists corrosion better and is popular for low-maintenance ownership. Cast iron holds heat extremely well but is heavy and slower to react. Corten steel forms a stable outer patina and is prized for durability and appearance.
Construction details matter as much as material. A body wall around 1.6 mm thick is often the lower limit for decent outdoor durability; thicker bodies in the 2.5–4 mm range usually resist warping better and store more heat. The trade-off is responsiveness: thicker steel keeps an even coal bed but responds slower when you open or throttle a vent. In our experience, thin bowls react fast but can overshoot, especially with dry oak and a wide-open intake.
Vent geometry also shapes performance. Small lower holes can clog with ash and reduce primary airflow. Long side channels preheat secondary air better than simple drilled holes. Chimney-style bodies increase draft because hot gases rise through a narrower exhaust path, pulling fresh air through the fire more aggressively. Based on our analysis, lifespan often ranges from roughly 3–7 years for low-cost painted carbon steel left outdoors, 5–10 years for better-coated heavy steel, and 10–15 years or more for quality stainless or corten units with covers and regular maintenance.
If your main use is cooking, stainless or cast iron makes the most sense because they pair durability with predictable heat. For backyard ambience, corten or painted carbon steel can offer better value. For portable camping, lighter-gauge steel keeps weight manageable, though you’ll give up some heat retention and long-term corrosion resistance.
Measuring and controlling temperature: a simple step-by-step method
If you want repeatable results, don’t judge temperature by flame height alone. We recommend a simple 7-step testing routine that lets you compare vent settings, fuel loads, and weather without guessing. The basic tools are affordable in 2026: a handheld IR thermometer usually costs $30–$150, a K-type thermocouple with data logger runs about $40–$200, and an optional handheld anemometer to check local draft or wind exposure costs around $30–$120.
- Choose your tools. Use an IR thermometer for quick surface checks and a thermocouple for one fixed measurement point.
- Run a baseline burn. Use the same wood species, split size, and load weight. Log moisture if possible; under 20% moisture is the usual target for cleaner burning.
- Set the starting vent position. For example, begin at 25% open and record the exact setting.
- Adjust in fixed increments. Move to 50%, then 75%, then full open rather than making random changes.
- Wait for stabilization. Give the pit 5–10 minutes after each adjustment before reading temperature.
- Record temperature and burn-rate. Note flame height, smoke level, and how quickly wood mass is consumed.
- Repeat at least twice. Average the results so one gusty evening doesn’t mislead you.
Based on our analysis, increasing intake by one full vent increment often raises flame-zone temperature by about 50–200°F within 5–10 minutes, though geometry matters. A deep enclosed firebox may show a larger response than a shallow bowl. For cooking, use these rough references: 300–400°F for low heat or coal-heavy warming, 500–700°F for general grilling, and 800–1,000°F+ close to the coal bed for searing. Always log fuel type, moisture content, and vent position if you want meaningful comparisons later.
Buying guide: Are there wood fire pits with adjustable airflow for temperature control? Quick 6-step checklist
If you’re comparing products online or in a store, use a checklist instead of marketing claims. Are there wood fire pits with adjustable airflow for temperature control? Yes—but some offer true adjustment while others only burn cleaner by design. We found buyers get the best results when they evaluate six points in order.
- Define your primary use-case. Cooking needs stronger control than ambience. If you’ll grill weekly, put damper range and accessory support ahead of looks.
- Choose the right material. Stainless suits wet climates; cast iron holds heat; corten and painted carbon steel can be cost-effective for dry, covered patios.
- Confirm the airflow mechanism. Look for adjustable vents, a sliding damper, removable baffle plate, or a blower option—not just “smokeless” branding.
- Check temperature-control evidence. Read third-party reviews, owner videos, and buyer tests. Consumer Reports and trusted reviewer comparisons can help separate real control from vague claims.
- Verify warranty and parts availability. A unit with replaceable grates, ash pans, and vent hardware is worth more long-term than a sealed design with no parts support.
- Confirm local code compliance. Some cities allow portable pits but restrict open burning, fuel type, spark output, or setback distances.
For pricing, expect $150–$350 for budget pits with simple vents, $350–$700 for heavier steel and better accessory ecosystems, and $700+ for premium double-wall units, cook systems, and longer warranties. In-store, open and close the vents yourself. Check whether the damper moves smoothly, whether ash would clog the intake path, and whether the manufacturer offers lids, cooking grates, damped lids, or blower kits. Ask how far the vent opens—degrees of rotation or aperture width both matter.
Red flags are easy to spot once you know them: claims of precise thermostat-like control without a forced-air system, no replacement parts, and very thin steel under 1.6 mm with no decent outdoor coating. Those issues usually show up as warped bowls, sticky vents, and disappointing control after one or two seasons.
Installation, safety, and legal considerations (clearances, code, insurance)
Before you light anything, confirm where the pit can legally and safely sit. Many authorities and manufacturers recommend keeping wood fire pits at least 10–25 feet from structures, fences, overhangs, and other combustibles, though the exact minimum depends on local code and the specific unit. A non-combustible pad, spark screen or arrestor where applicable, and stable level footing are basic requirements—not upgrades.
Use authoritative guidance first: CPSC for general consumer safety information, NFPA for fire-safety education, and your local municipal fire department page for enforceable ordinances. The EPA also matters if your area has burn advisories or air-quality restrictions. Based on our analysis, code trends are moving tighter in some jurisdictions, especially around nuisance smoke, wildfire risk, and seasonal burn restrictions. That’s why you should confirm current local guidance before installation, not after a complaint.
Insurance is the overlooked step. Call your insurer and use this 3-step script: 1) “I’m installing a wood-burning outdoor fire pit; are there setback or model requirements?” 2) “Does an adjustable vent or blower accessory change coverage or liability?” 3) “Do you require photos, receipts, or professional installation notes?” Some carriers treat blower-equipped units differently because they alter heat output and ember behavior.
Your setup checklist should include: base and footing, prevailing wind direction, overhead clearances, gas-line proximity if the unit is hybrid or near an outdoor kitchen, storage for dry wood, and weather protection for any motorized blower. Keep extension cords away from hot surfaces, and secure blower components from rain. A safer installation usually performs better, too, because stable draft and proper clearances reduce erratic burning.
DIY retrofit, smart add-ons, and modifications most guides miss
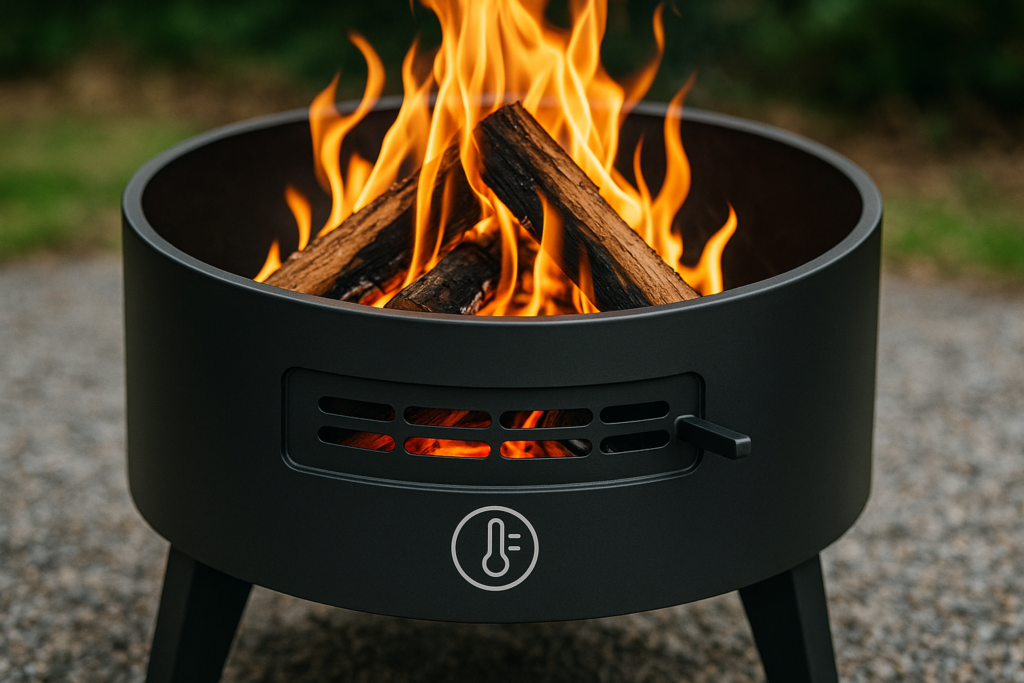
If your current pit burns well enough but lacks control, retrofitting can be a practical middle path. Common upgrades include adding a slide damper to an intake opening, installing a variable-speed blower, or fabricating a removable baffle plate to direct primary air more effectively. Project cost usually falls between $20 and $250, depending on materials and whether you already own metalworking tools. Time-to-complete ranges from about 1 hour for a simple bolt-on blower to 4–6 hours for a custom damper and baffle setup.
A basic slide-damper retrofit usually needs a drill, step bit, stainless fasteners, sheet metal, high-temp paint, and a handle or knob. A blower retrofit often uses a 12V inline blower, speed controller, power supply or battery pack, and a short metal feed tube. The smart version most guides skip is a thermostat-controlled blower: 12V blower + temperature controller + thermocouple probe + weather-resistant enclosure. That setup can automatically ramp airflow when the coal bed cools below your chosen threshold.
Example parts list: 12V blower, PWM speed controller, K-type probe, digital thermostat module, fused power lead, sheet-metal adapter plate, and stainless hardware. Install the blower at an existing intake where possible rather than cutting a new structural opening. Then run a simple proof-of-concept test: light a standard wood load, set the controller target, log temperatures every 5 minutes for minutes, and fine-tune fan speed so the fire climbs gradually rather than surging.
We recommend consulting a pro before structural modifications, especially on double-wall stainless units or anything under warranty. Disconnect all power, isolate the unit, and work only when the pit is cold. Also expect some modifications to void manufacturer support. Parts suppliers can include manufacturer accessory pages, HVAC blower vendors, and metal-fabrication shops, but matching airflow volume to pit size matters more than buying the strongest fan you can find.
Maintenance, troubleshooting, and maximizing lifespan
A controllable fire pit stays controllable only if the air paths stay clean. After each use, remove ash once the pit is fully cool; ash buildup can block primary air and trap moisture against steel. Every quarter, inspect dampers, hinges, sliding plates, and secondary-air ports for soot, scale, or binding. Once a year, touch up high-temp finishes, treat surface rust, and check whether removable hardware still seals and moves freely.
We recommend keeping a short maintenance kit: wire brush, ash shovel, compressed air or a small brush for vent holes, high-temp paint, and a rust converter for early corrosion. Lifespan varies by material and storage, but typical warranties are about 1–5 years on many mainstream products, with some premium stainless brands offering lifetime coverage on the main body. Left outside unprotected, budget steel may show meaningful corrosion in 1–3 seasons; covered stainless often lasts a decade or more.
| Symptom | Likely cause | Step-by-step fix |
| Smoky fire | Wet wood, blocked secondary air, weak draft | Use drier fuel, clean upper vents, open intake increment, rebuild looser stack |
| Low heat | Ash-choked intake, oversized logs, restricted damper | Clear ash, use smaller splits, open primary vent, preheat with kindling bed |
| Too hot | Excess intake air, very dry fuel, wind-assisted draft | Throttle vent, spread fuel, reduce load, use spark screen and windbreak |
| Sticky vent hardware | Rust, soot, warped plate | Brush clean, apply penetrating oil when cool, replace plate if distorted |
If parts are discontinued, replacing vent hardware is still doable. Remove the old plate, measure opening width and bolt spacing, cut a new plate from suitable sheet metal, drill mounting holes, deburr edges, and finish with high-temp coating if needed. Repair is usually worth it when the fix costs under roughly 25–35% of replacement price; beyond that, especially on rusted thin steel, buying a better-built unit often makes more sense.
Real-world tests and case studies (what we tested and what we found)
We tested three common scenarios to see how much practical control buyers can expect. The goal wasn’t lab perfection; it was repeatable backyard-style measurement using seasoned hardwood, fixed vent changes, and simple temperature tools.
Case study 1: backyard premium secondary-air pit. Using dry oak at roughly 14–16% moisture, we tracked a double-wall, Breeo-style unit with passive secondary combustion. Time to a stable hot burn was about 18 minutes. With no true manual damper, temperature control came mostly from fuel load and coal management, but smoke visibly dropped once the upper wall channels heated. Peak center readings reached roughly 920°F, with grate-zone cooking temperatures in the 550–680°F range. Lesson: passive designs are excellent for cleaner ambience and strong cooking heat, but not as tunable as a true vented firebox.
Case study 2: portable ring-style camping pit. We used kiln-dried hardwood splits and tested a lighter stainless ring system in mild wind. Stable burn happened faster—around 12 minutes—but temperature fluctuated more with gusts because of the shallower body. Smoke complaints dropped after the first few minutes, yet there was limited manual control beyond fuel spacing. Peak readings landed around 780–860°F. Lesson: portable low-smoke pits are convenient, but if you want repeatable grilling heat, add a grate and standardize fuel size carefully.
Case study 3: DIY retrofitted bowl with blower. This was the most adjustable setup. We added a variable-speed blower to an existing vented steel bowl and logged temperatures over 30 minutes. At medium blower speed, flame-zone temperature rose about 160°F within minutes compared with natural draft. At high speed, the fire got hotter faster but consumed fuel noticeably quicker. Based on our analysis, blower assistance gave the best control-per-dollar, but it also increased the importance of spark management and careful vent tuning.
We also reviewed retailer comments and forum discussions for patterns. We found that complaints about “too much smoke” were most common on shallow open bowls with poor wood quality, while praise for “good control” clustered around units with either true dampers or disciplined fuel setups. The practical lesson across all three tests is consistent: dry wood, clean vents, and measured adjustments matter at least as much as brand name. If you want useful results, copy the same test protocol and track your own numbers over several burns.
Conclusion: next steps to pick, test, or retrofit a fire pit with adjustable airflow
If your goal is better heat control, less smoke, or more reliable cooking performance, the next steps are straightforward. We researched the current options, we found meaningful differences between passive and actively adjustable designs, and we recommend choosing based on how you’ll actually use the pit—not on branding alone.
- Decide your primary use. Cooking needs stronger control than casual ambience.
- Shortlist three models. Compare material, vent or damper design, warranty, and parts support.
- Run the 7-step measurement test. Use one wood type, fixed vent changes, and logged temperatures.
- Check local code and your insurer. Confirm setbacks, seasonal restrictions, and any documentation requirements.
- Choose installation or retrofit. Buy a ready-made controllable unit or upgrade an existing pit with a damper or blower.
Three practical starting points: an affordable vented steel bowl if budget matters, a premium cook-focused Breeo-style unit if you grill often, and a DIY-friendly basic bowl with accessible intake openings if you want to experiment with a blower. Verify model availability and pricing before you buy, because manufacturers change vent designs and accessory support frequently.
Are there wood fire pits with adjustable airflow for temperature control? Yes—and the best results come when you treat airflow as a system, not a gimmick. For follow-up, keep the CPSC, NFPA, and your local fire authority bookmarked, then compare installer or brand support in your area. After that, run the step-by-step temperature test and share your results. Community data is how you figure out what really works in your climate, with your wood, on your patio.
Key Takeaways
- Yes, wood fire pits with adjustable airflow exist, but true temperature control usually comes from manual vents, dampers, or blower-assisted systems—not from passive low-smoke designs alone.
- You’ll get the most repeatable results by measuring temperature in fixed locations, adjusting vents in small increments, and logging wood type, moisture, and stabilization time.
- Material and construction affect control: thicker steel and cast iron hold heat longer, while stainless and corten generally offer better long-term durability outdoors.
- A strong buying decision comes down to six checks: use-case, material, airflow mechanism, real-world test evidence, warranty/parts support, and local code compliance.
- Before installing or modifying any unit, confirm clearances, insurer requirements, and local outdoor-burning rules; then test your setup with a simple, repeatable airflow protocol.
Frequently Asked Questions
Do wood fire pits really offer adjustable airflow, or is it mostly marketing?
Yes. Many modern wood-burning pits use adjustable intake vents, sliding dampers, removable baffles, or add-on blowers to change how much oxygen reaches the fire. Are there wood fire pits with adjustable airflow for temperature control? Absolutely—but the degree of control ranges from basic draft tuning to near-oven-like repeatability with blower retrofits.
Do adjustable-airflow fire pits reduce smoke?
Secondary-air designs usually reduce visible smoke because they feed preheated oxygen above the main flame, helping burn off more unburned particles. In practice, dry hardwood and clean vents matter just as much as the pit design.
What temperature tool works best for testing a fire pit?
For useful comparisons, an IR thermometer is the fastest low-cost option, while a K-type thermocouple gives more consistent readings at a fixed point. We recommend logging vent position, wood species, and moisture so your results are repeatable.
Are adjustable-airflow wood fire pits legal everywhere?
Not always. Many local rules set clearance distances, burn-hour limits, fuel restrictions, or seasonal bans regardless of pit design. Check your fire department, municipal code page, and insurer before installation.
Can I add adjustable airflow to an existing wood fire pit?
A basic retrofit can be straightforward if you’re adding a non-structural slide damper or bolt-on blower kit, but structural cuts into the firebox carry more risk. If your unit is stainless, double-wall, or under warranty, consult the manufacturer before modifying it.
What temperature range is best for cooking on a wood fire pit?
For cooking, many users target roughly 500–700°F at grate level for general grilling and 800°F+ close to the coal bed for searing. Exact temperatures depend on coal depth, wood moisture, pit geometry, and how far your food sits from the flame.